Chapter 2: Adding a player character
In this chapter, we’ll add a floor to the scene, and then a player character that can run around in the world.
Creating a floor
First, remove all code within fn main in server.rs, and replace it with the following:
#![allow(unused)]
fn main() {
Entity::new()
    .with(quad(), ())
    .with(scale(), Vec3::ONE * 10.0)
    .with(color(), vec4(1.0, 0.0, 0.0, 1.0))
    .with(plane_collider(), ())
    .spawn();
}
This will create a basic ground plane for us. Note that you will have also removed the camera, so you will not be able to see the plane yet. That’s normal!
Tip: When you save the file, the components are likely to have red squiggly lines under the components; that’s because they haven’t been imported yet. Click one of them, then hit
Ctrl-.(orCmd-.on macOS) and choose “Import …”.
In-depth: Visit the full API reference docs for details on the use of
Entity,.withand.spawn.
In-depth: Entities are the basic unit in an ECS. You can think of the ECS as a database, where entities are rows, and components (
quad,scale,colorandplane_colliderin this case) are columns.Components are always pure data; they don’t have any functionallity on their own. Instead, you typically write queries that read and write from the ECS (systems). Read more about the ECS here.
Adding a player controller
Ambient supports dependencies, similar to Rust’s Cargo. To help you in your game-making journey, we’ve created several standard packages that you can use.
We’re going to use some of these packages to build our experience today. Start by adding the following to your ambient.toml:
[dependencies]
base_assets = { deployment = "79plwEq1A0N3t0ExBOMTPM" }
third_person_controller = { deployment = "yV6nlkxj25cmkBhd4koe8" }
character_animation = { deployment = "4nLmHfcAlZkvWbK0NANMoC" }
hide_cursor = { deployment = "2ejmKJKgh6b4pTnwWPdv4s" }
In-depth: To learn more about dependencies, check out the reference documentation.
Add the following code to server.rs:
#![allow(unused)]
fn main() {
spawn_query(is_player()).bind(move |players| {
    for (id, _) in players {
        entity::add_components(
            id,
            Entity::new()
                .with_merge(ThirdPersonController::suggested())
                .with(model_from_url(), packages::base_assets::assets::url("Y Bot.fbx"))
                .with(basic_character_animations(), id),
        );
    }
});
}
Note: As before, you will need to import these components from their packages. You can use
Ctrl+.(orCmd+.on macOS) to do this.
In-depth: A
spawn_queryruns when an entity with a specific set of components is seen for the first time (including when it is spawned).Here, when a player spawns, we add a few components to that player to give it an animated model (
model_from_url), use basic character animations (basic_character_animations) and to make it react to input with a camera that follows the character (.with_merge(ThirdPersonController::suggested())).
Run your game by pressing F5 in VS Code (or by typing ambient run in your terminal).
You should now see something like this on the screen:
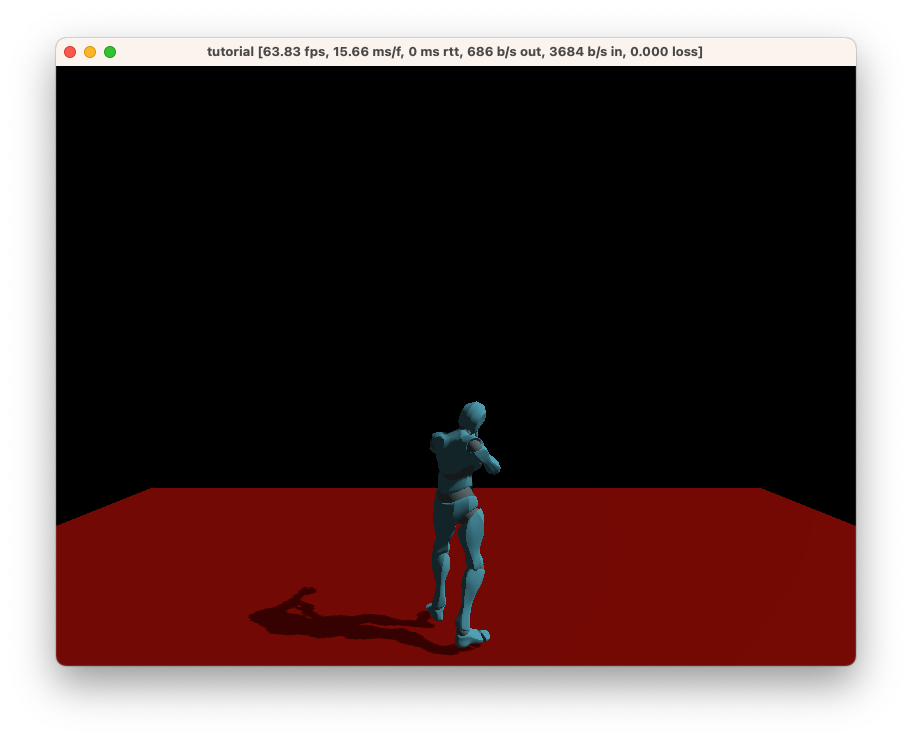
This character will respond to input, including moving around using WASD, jumping with Space, and looking around with the mouse.
Congratulations! You can now use this character as a base for the rest of the tutorial.
Source: The complete code for this chapter can be found here.
Challenge: Add a
camera_distancecomponent to-1.0for a first-person-like experience.Source: The complete code for this challenge can be found here.